1. Setup Your Pi
Note: you can skip this step if your Pi is already up and running.
Let’s begin by setting up the Pi. The Raspberry Pi 3 board includes -
- 4 USB ports
- HDMI port for video output (you’ll be using this to connect to your HDMI monitor)
- 3.5mm audio jack for sound output (you’ll be using to connect your earphones)
- Micro SD card slot
- Ethernet port
Assembling Your Pi
- Check that your micro SD card is inserted into the micro SD card slot on your Pi.
- Plug in the USB microphone and 3.5mm earbuds.
- Connect the keyboard and mouse to the USB ports.
- Connect your monitor using the HDMI port.
- Insert ethernet cable into the Pi. (not shown in this picture)
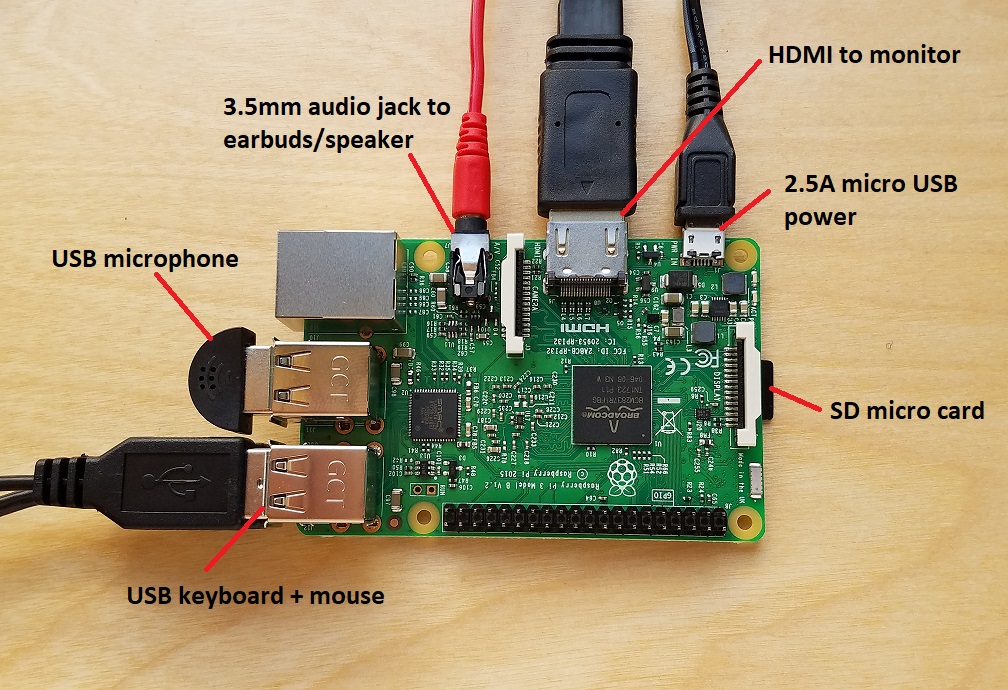
Booting Your Pi
- Plug in the power supply to the micro USB connector on the Pi. You should see a loading screen go through some startup steps before booting to desktop - if you run into any errors, request a new SD micro card to boot the OS from.
- Verify ethernet is working by clicking on the connectivity icon in the top right of the tool bar (next to the speaker icon). You should see an up/down arrow pair (not X’d out).
- Open a web browser by clicking on the globe icon in the top left toolbar.
Checkpoint 1
- Make sure you’re connected to the internet and are able to navigate to https://developer.amazon.com.


